Omu Mapping
aarrrwrlurllAlwuRmmwarmAaAr wrlurllmlwarAlwuRm mwAlwarwlmwar wrurrlwlmwarlmwarwurlMuruuRlmmr mlarwlurrluuRlmmrmAaArAlwuRm mwarmlwar wrurrlwlarrul mmarmlwar arrmawAlwuRmwrlurll arrmawmwAlwarwlarrulwlAmur wrlurllmlwarwurlMurmwaarr mwAlwarwlmwarAlwuRmarrmaw wrurrlwlmwarmwrrrarrmawwrurrl mwAlwaraarrrmlwarmmar wlurrlarrmawwlarrullmwararrmaw maaArmar lmwaruuRlmmrlmwarwlmwar wurlMurwlurrlaarrr mwaarrmwarmrrrAw lmwarmAaArmwrrrarrmaw uuRlmmrwlAmurwlAmurmlarmwar wrurrlwrlurllarrmawmlwar mwaarrAlwuRm lmwarwlurrlwrlurllmlarmwrrr arrmawarrmaw wlmwarmlar wurlMurmarmwarwrlurll maaArwlmwarwlAmurmlwar mwaarraarrrmwAlwararrmawmlar wlarrulmaaArwlmwar mwAlwarmAaAruuRlmmr mwrrrmAaArmrrrAwwlAmur uuRlmmrmlwar wlarrulwurlMurmlar
> There is sadly no way to save a Shuttle on normal station forks like Omu during a running shift, you need to be on a special
mappingmap as an administrator to do that.
Disclaimer
This blog post is more about setting up everything to map, and does not go into detail on how to create good maps or shuttles.
Here are links to some official resources:
- https://docs.spacestation14.com/en/space-station-14/mapping/guides/general-guide.html
- https://docs.spacestation14.com/en/space-station-14/mapping/guidelines.html
Prerequisites
You’ll therefore either need to run a localhost of the fork or set up a Omu Dev Environment, the first one is a lot simpler.
Setting up a localhost
- Download the latest version from here: https://cdn.projectomu.org/fork/OmuStation
- Extract the zip file
- Run
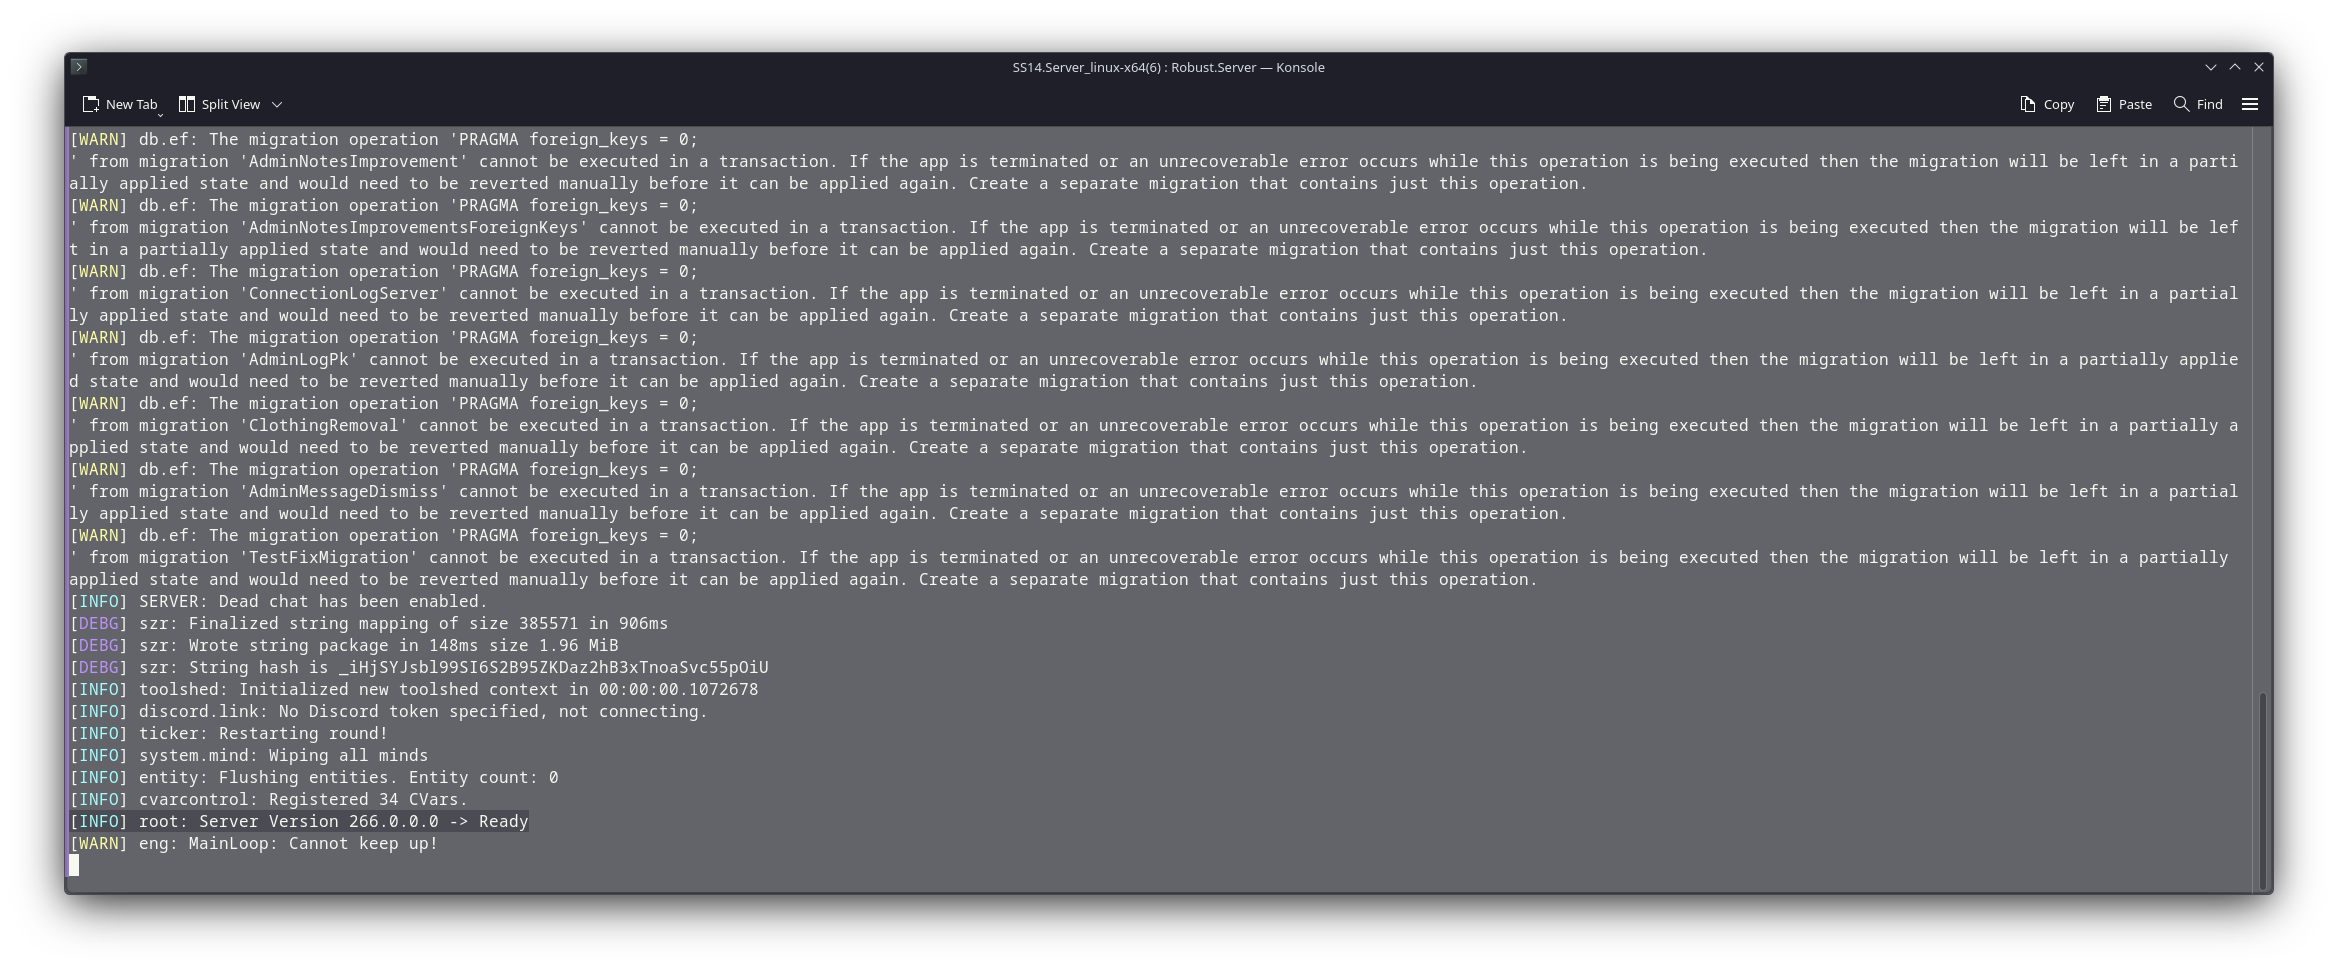
Robust.Server.exe(Or on Linuxchmod u+x Robust.Serverand then./Robust.Server) - Wait for the server to start and show “Server version -> Ready”
- Connect to it with the normal launcher with
ss14://localhost/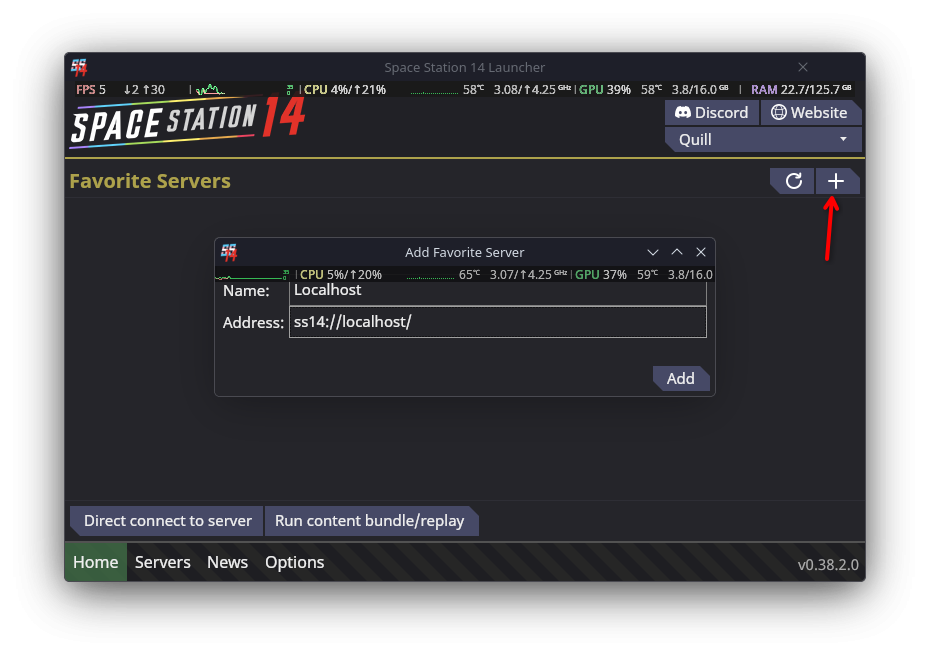
Running console commands
There is three ways to run console commands in the game:
- Open the console in the games’ client with the button left next to your number row. For me, it’s
- Open the console in the servers’ console window.
- Type the command into the chat window by appending a
/to the command, for examplehelpwould turn into/help.
maaArmwrrrmwrrr wlarrulmAaArwlurrlmmar mlwarwlAmur AlwuRmmlwar mwrrrmAaArwrurrl mwaarrlmwarmAaArAlwuRmlmwar wlmwarwlurrlmaaArwlarrul mmaraarrrmaaArmwrrrmmar maraarrr wlmwarmarmwAlwar
> Command arguments in
<>are required.[]are optional arguments.
File paths
Some commands, like, for example, the savemap command, take a file path. The path is relative to the server’s data directory.
For example /maps/mystation/1.yml would create a file in <servers directory>/data/maps/mystation/1.yml.
Setting up the round
Most of this is purely optional, but it’s a good idea to do them so the servers’ resources don’t get unnessecarily wasted on a station which you’re not playing on anyway.
I would recommend setting the following things:
forcemap EmptyThis will load in an empty map without a station.forcepreset SandboxThis won’t spawn any annoying events and allows you to focus on mapping.
After entering the forcepreset command, the server should start the round automatically, if it doesn’t then force a round start with startround.
Then click on Observe and Admin Observe.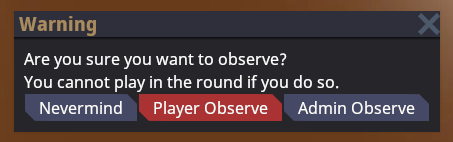
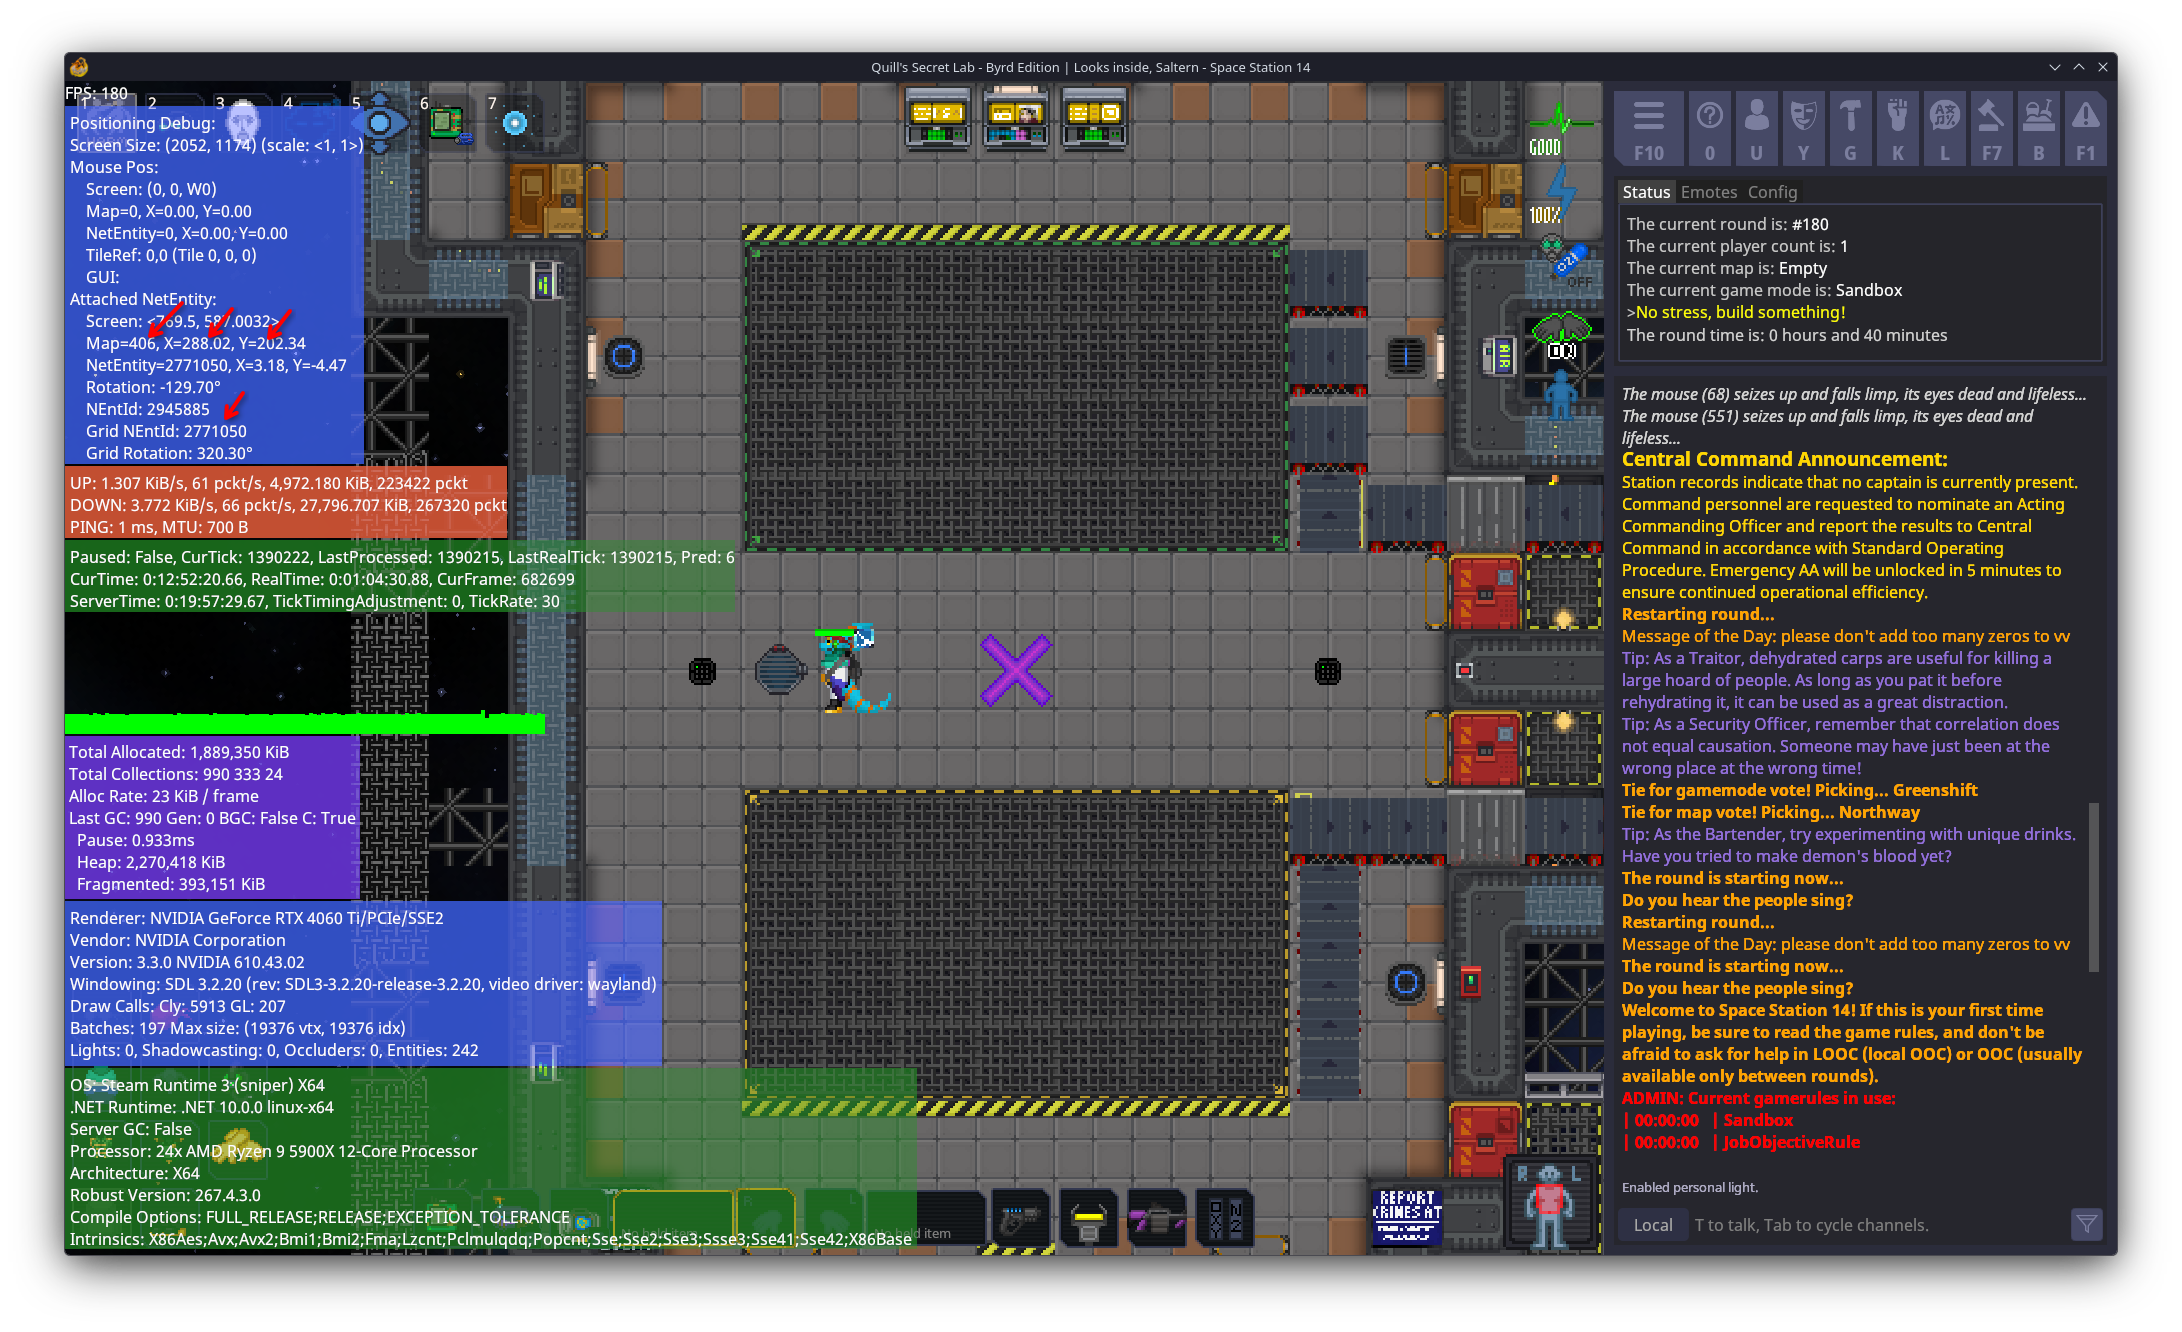
F3 Menu
The F3 Menu is a great tool to find important information about the map and grid you’re currently on.
Most importantly, you’re able to see:
- The current map id
- The current grid id
- The characters’ position
Mapping command
The general command looks like this: mapping <map id> [path to map file]
You need to use this command to either create a new map or load an existing one in mapping mode.
Each map needs a map id, it is a randomly generated number, to create or load a map you need to ensure you use a map id which does not exist currently on the server yet. (Map ids are not tied to a specific map, they’re just a internal number for the server, so for example you could probably always use a number like 1000 to keep it simple)
This mode is a bit special, as it does not “tick” the map, so nothing on it works, which therefore allows the server to save the map properly into a file.
However, on the other hand, it also means you can’t test anything on the map as things like power or gas won’t work.
Creating a new map in mapping mode
To create a new map, simply run mapping 1000 (for example) and it’ll create a new map for you and teleport you to it.
If you are unable to move, make sure you’re in admin ghost mode, simply run aghost for that and then it should work.
When you run a mapping command, the client should have also executed mappingclientsidesetup automatically. This command adds a couple features to the client, like more actions or that it shows pipes and wires above all tiles.
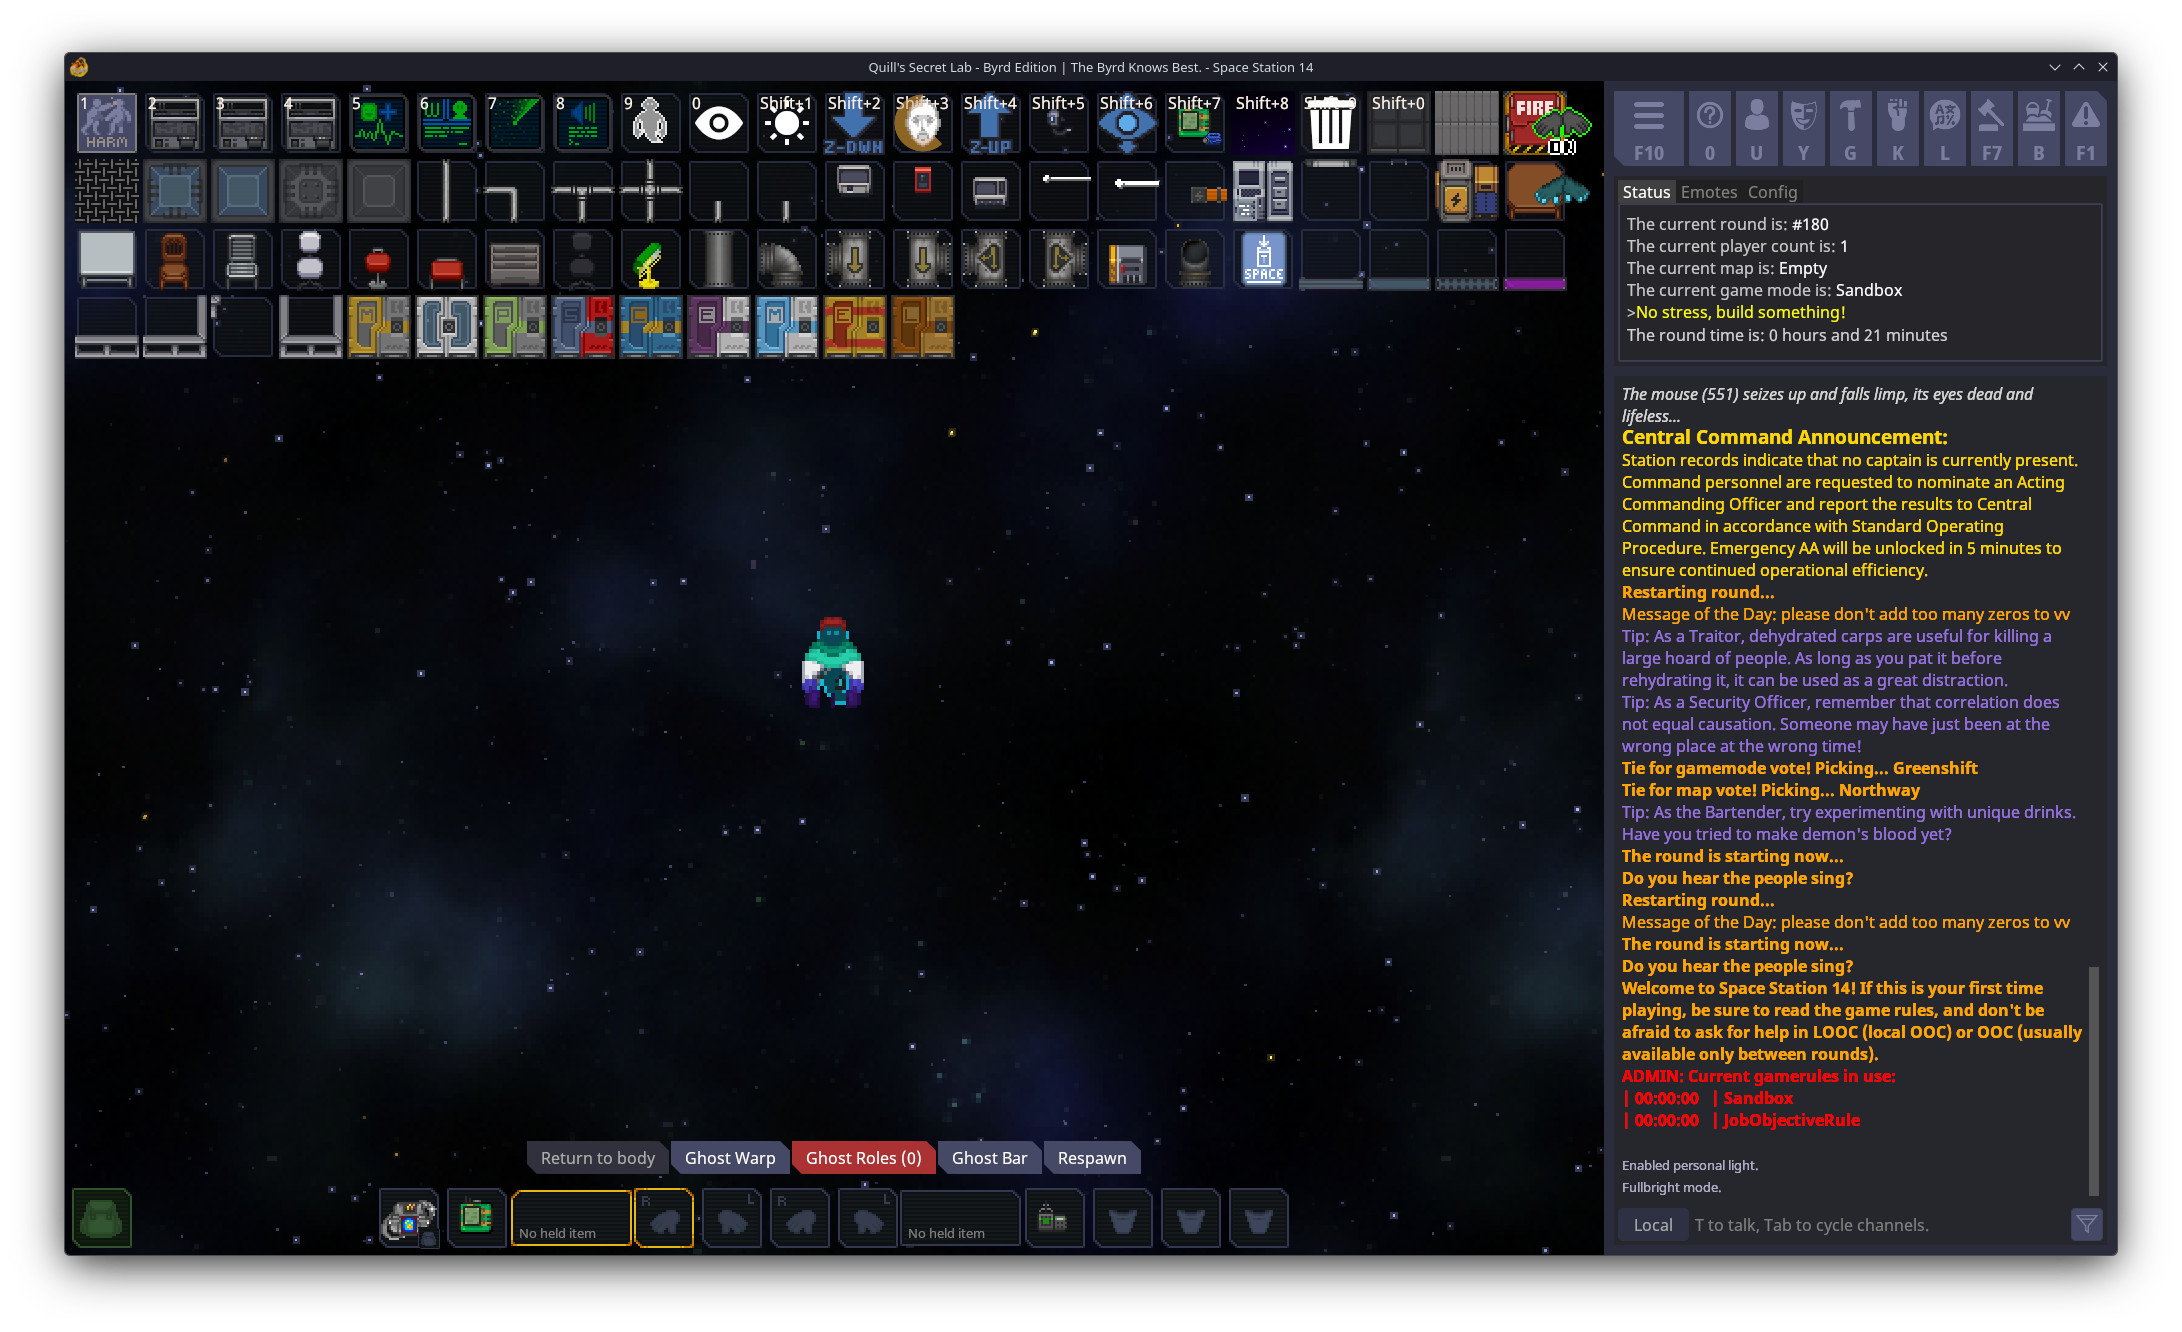
mwaarrmlar mlwarwlmwarwlmwarwrlurll mlarwlurrl aarrrmwaarrlmwarwurlMur aarrrwlurrlwrurrl wlmwarAlwuRmmlwar mwAlwarwlmwar wlarrulmwaarrmrrrAwmlarmrrrAw mAaArmwarmar mwarmaaArwlurrlwurlMur wurlMurwlurrlmAaAr wrlurlluuRlmmrwurlMur mwaraarrraarrrmlwarmaaAr wurlMurmmaraarrr mwrrrarrmawwlAmurwlAmur wurlMuraarrr wrlurllaarrrmwaarrwurlMur mwrrrmmarlmwarmlar wrurrllmwar wlAmuraarrrlmwarwlarruluuRlmmr
> Remember that you can delete actions by right-clicking on them or getting them back by using the actions menu (
kon your keyboard).
Loading an existing map in mapping mode
To load an existing map, simply run mapping 2000 /Maps/_Omu/saltern.yml (for example) and it’ll load the map for you and teleport you to it. Pre-existing station maps are in the /Maps folder.
Saving the map
Saving the map is as simple as running savemap <map id> <path to map file>, for example savemap 1000 /maps/mystation/1.yml.
mAaArmwaarrwlAmurwlAmur maaArmlarwlmwarmwrrrwrurrl mrrrAwwlmwarAlwuRm wrlurllmaaArmaaAr wlAmurAlwuRm maaArmwAlwarmar uuRlmmrmlwarmwarmwar AlwuRmuuRlmmrwlmwar mlwarmwAlwarmmarmwaarr mrrrAwwurlMuruuRlmmr wlAmurwlmwarwlmwar maaArmmarmAaArwrurrlmlar mmaraarrrmrrrAw aarrrmaaArmlwarwurlMurmlwar maaArwrlurllmlwarmmar wlAmurwrlurll uuRlmmrmAaArlmwaruuRlmmrmwrrr mrrrAwmarmwAlwar
> I would recommend creating multiple versions of a map so you can roll back to an old state.
Autosaving
The server should create an Autosaves folder and regularily save map backups into there.
I however recommend to save often and incrementally.
There is also a toggleautosave <map id> <map name> command, but I haven’t figured out how it works yet.
Saving a grid
Saving a grid is pretty much the same as saving a map. It’s simply savegrid <grid id> <path to grid file>, for example savegrid 205843 /maps/mygrid/1.yml.
Grids
uuRlmmrwurlMurwlarrulwurlMurmrrrAw
> Sighs
A map holds multiple grids. For example, the station is a grid, or the ATS, or the Reclaimer, …
When you build one thing you should make sure it stays one grid. If you accidentally create multiple grids, things can get a bit messy:
Power doesn’t properly work across grids, walls don’t connect with one another, you’re not going to be able to load the grid into a round, and other small issues.
Usually when you place down tiles next to a grid, the game connects those automatically to the grid. HOWEVER, sometimes it bugs out, or you use the drag and drop function, and then it doesn’t connect them and creates new grids instead.
Luckily you can see all the grids there are on the map by running the lsgrid command (Or by using the F3 menu, flying over tiles, and checking if the Grid NEntId changes).
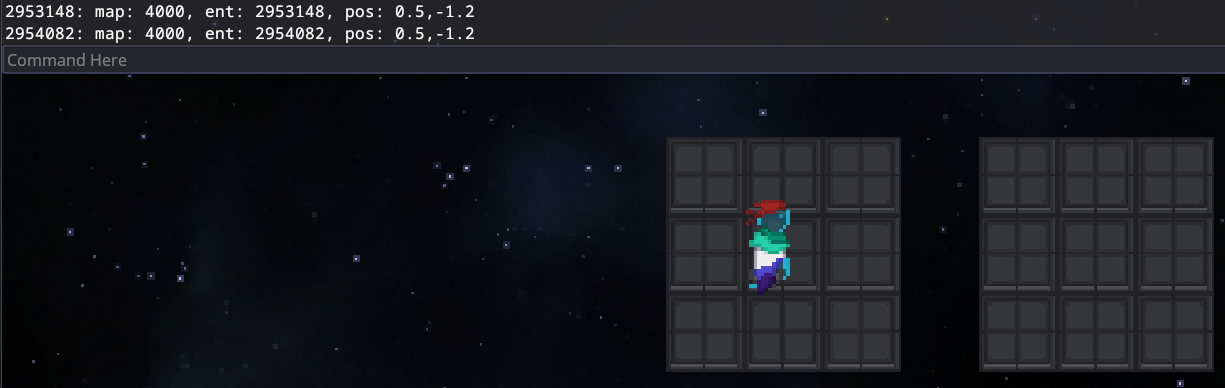
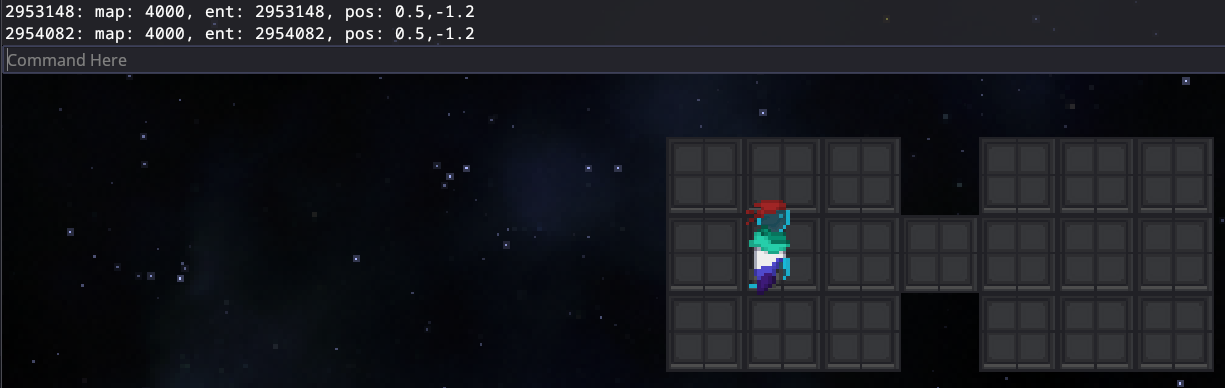
In this example here it’s quite obvious that there are two grids, but even when I connect them together, they’ll stay two grids.
Merging Grids
You need to manually merge the grids with the merge_grids <grid a> <grid b> <x offset> <y offset> [angle] command.
Generally you can totally ignore x, y, and angle, so we can just set those to 0 whenever we run the command.
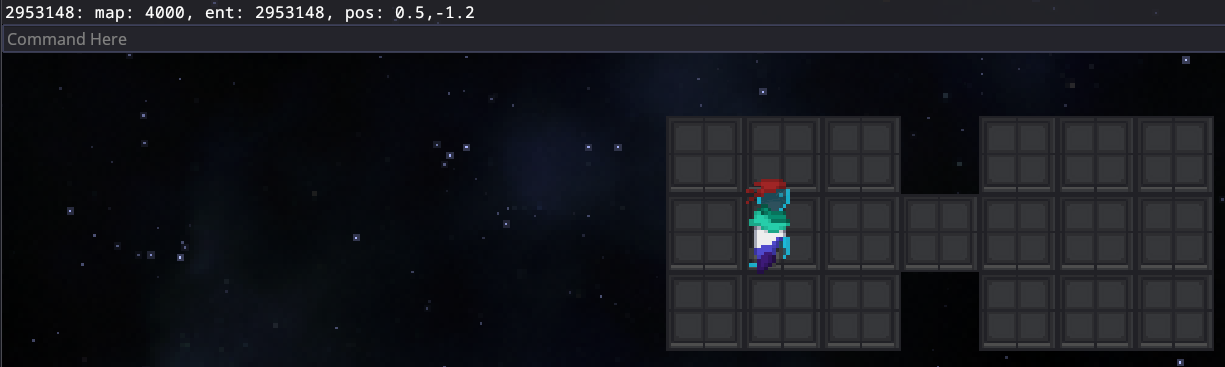
So in the example above, I run merge_grids 2953148 2954082 0 0 0 to combine those two grids.
Naming your Grid
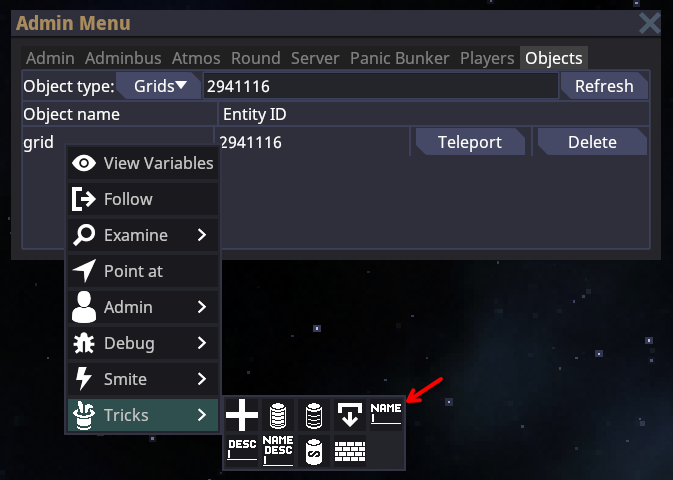
I would heavily recommend naming your grid, so you can easily find it later if you forget the grid id.
For that open the admin menu (F7 hotkey), open the Objects tab, search for the grid id, and then right-click on the grid -> tricks -> rename.
After that you can use the name in the search box and teleport to it whenever you need to.
Mapping (Finally!)
Use your action bar, or the Sandbox panel (b hotkey) to spawn in tiles and entities.
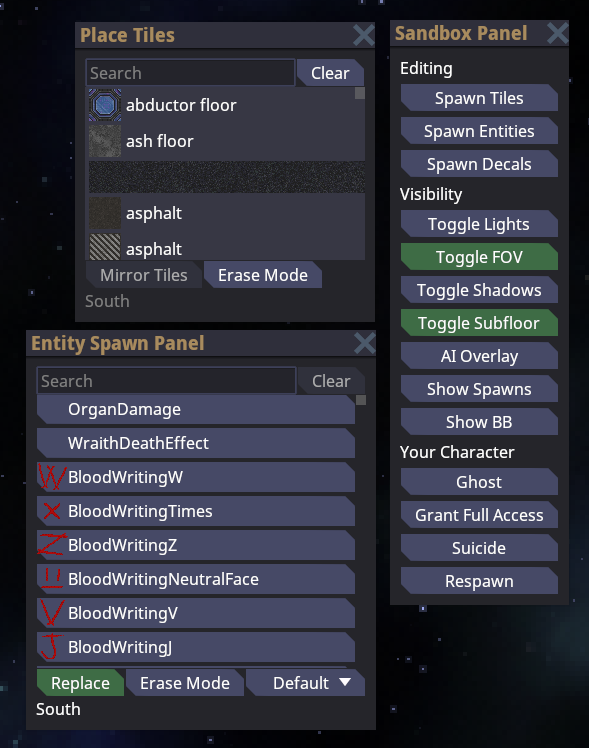
Both Place Tiles and Entity Spawn Panel menus have an erase mode button, in case you missplaced a tile or entity. (Remember the thing about grids, if you delete a tile which connects two regions together, then those regions will get split up into multiple grids, and you need to merge them again.)
Tiles are literally the “ground”, everything else is an entity, like walls, power cables, items, characters, and so on.
You need to first place down some tiles and then you can place entities on top of them.
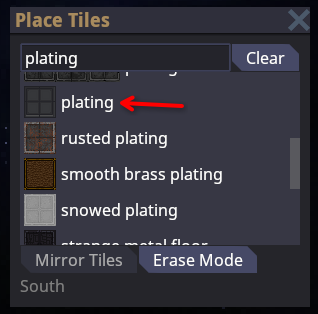
Usually the plating tile is the one you want to start out with, you can always change the tile later by placing new tiles on top of it.
Fix grid atmos
Once you’re done mapping, have setup power and atmos, and everything around it, you need to fill the grid with a proper breathable atmosphere. Just run fixgridatmos <grid id> and the game does that for you.
Testing the map
Once you’re relatively happy with what you’ve built, or if you want to test out a specific section of it, you should probably load the map and give it a try.
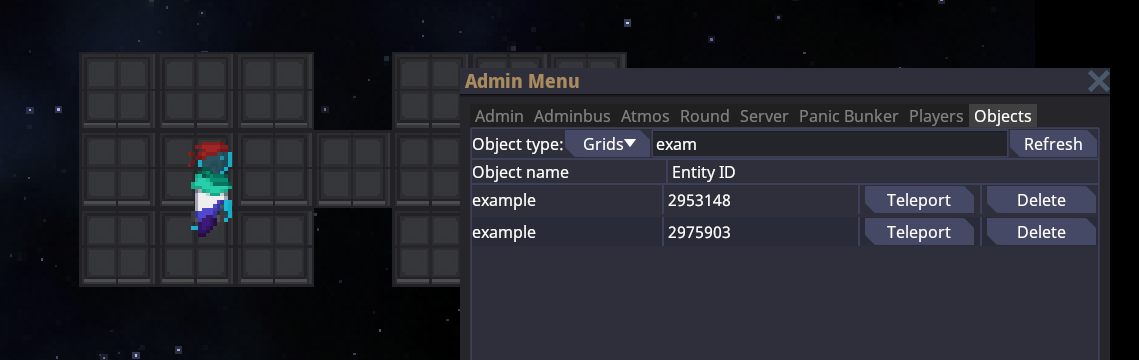
Run loadmap <map id> </path/to/map/file.yml> and teleport yourself to it by looking up the grid name you’ve given earlier and teleporting yourself to the higher grid id number (Make sure to click refresh before you do).
Loading a grid into a “live round”
Once you’ve saved the grid individually, you can load it directly into a proper round.
The command is similar again to the loadmap one, loadgrid <grid id> </path/to/grid/file.yml> [x] [y] [angle].
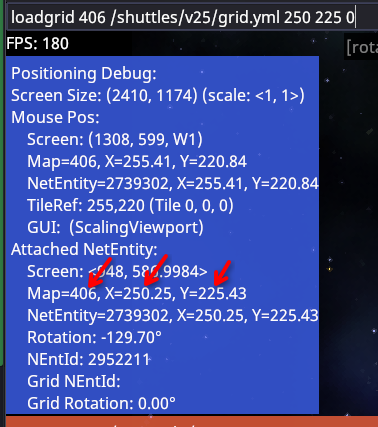
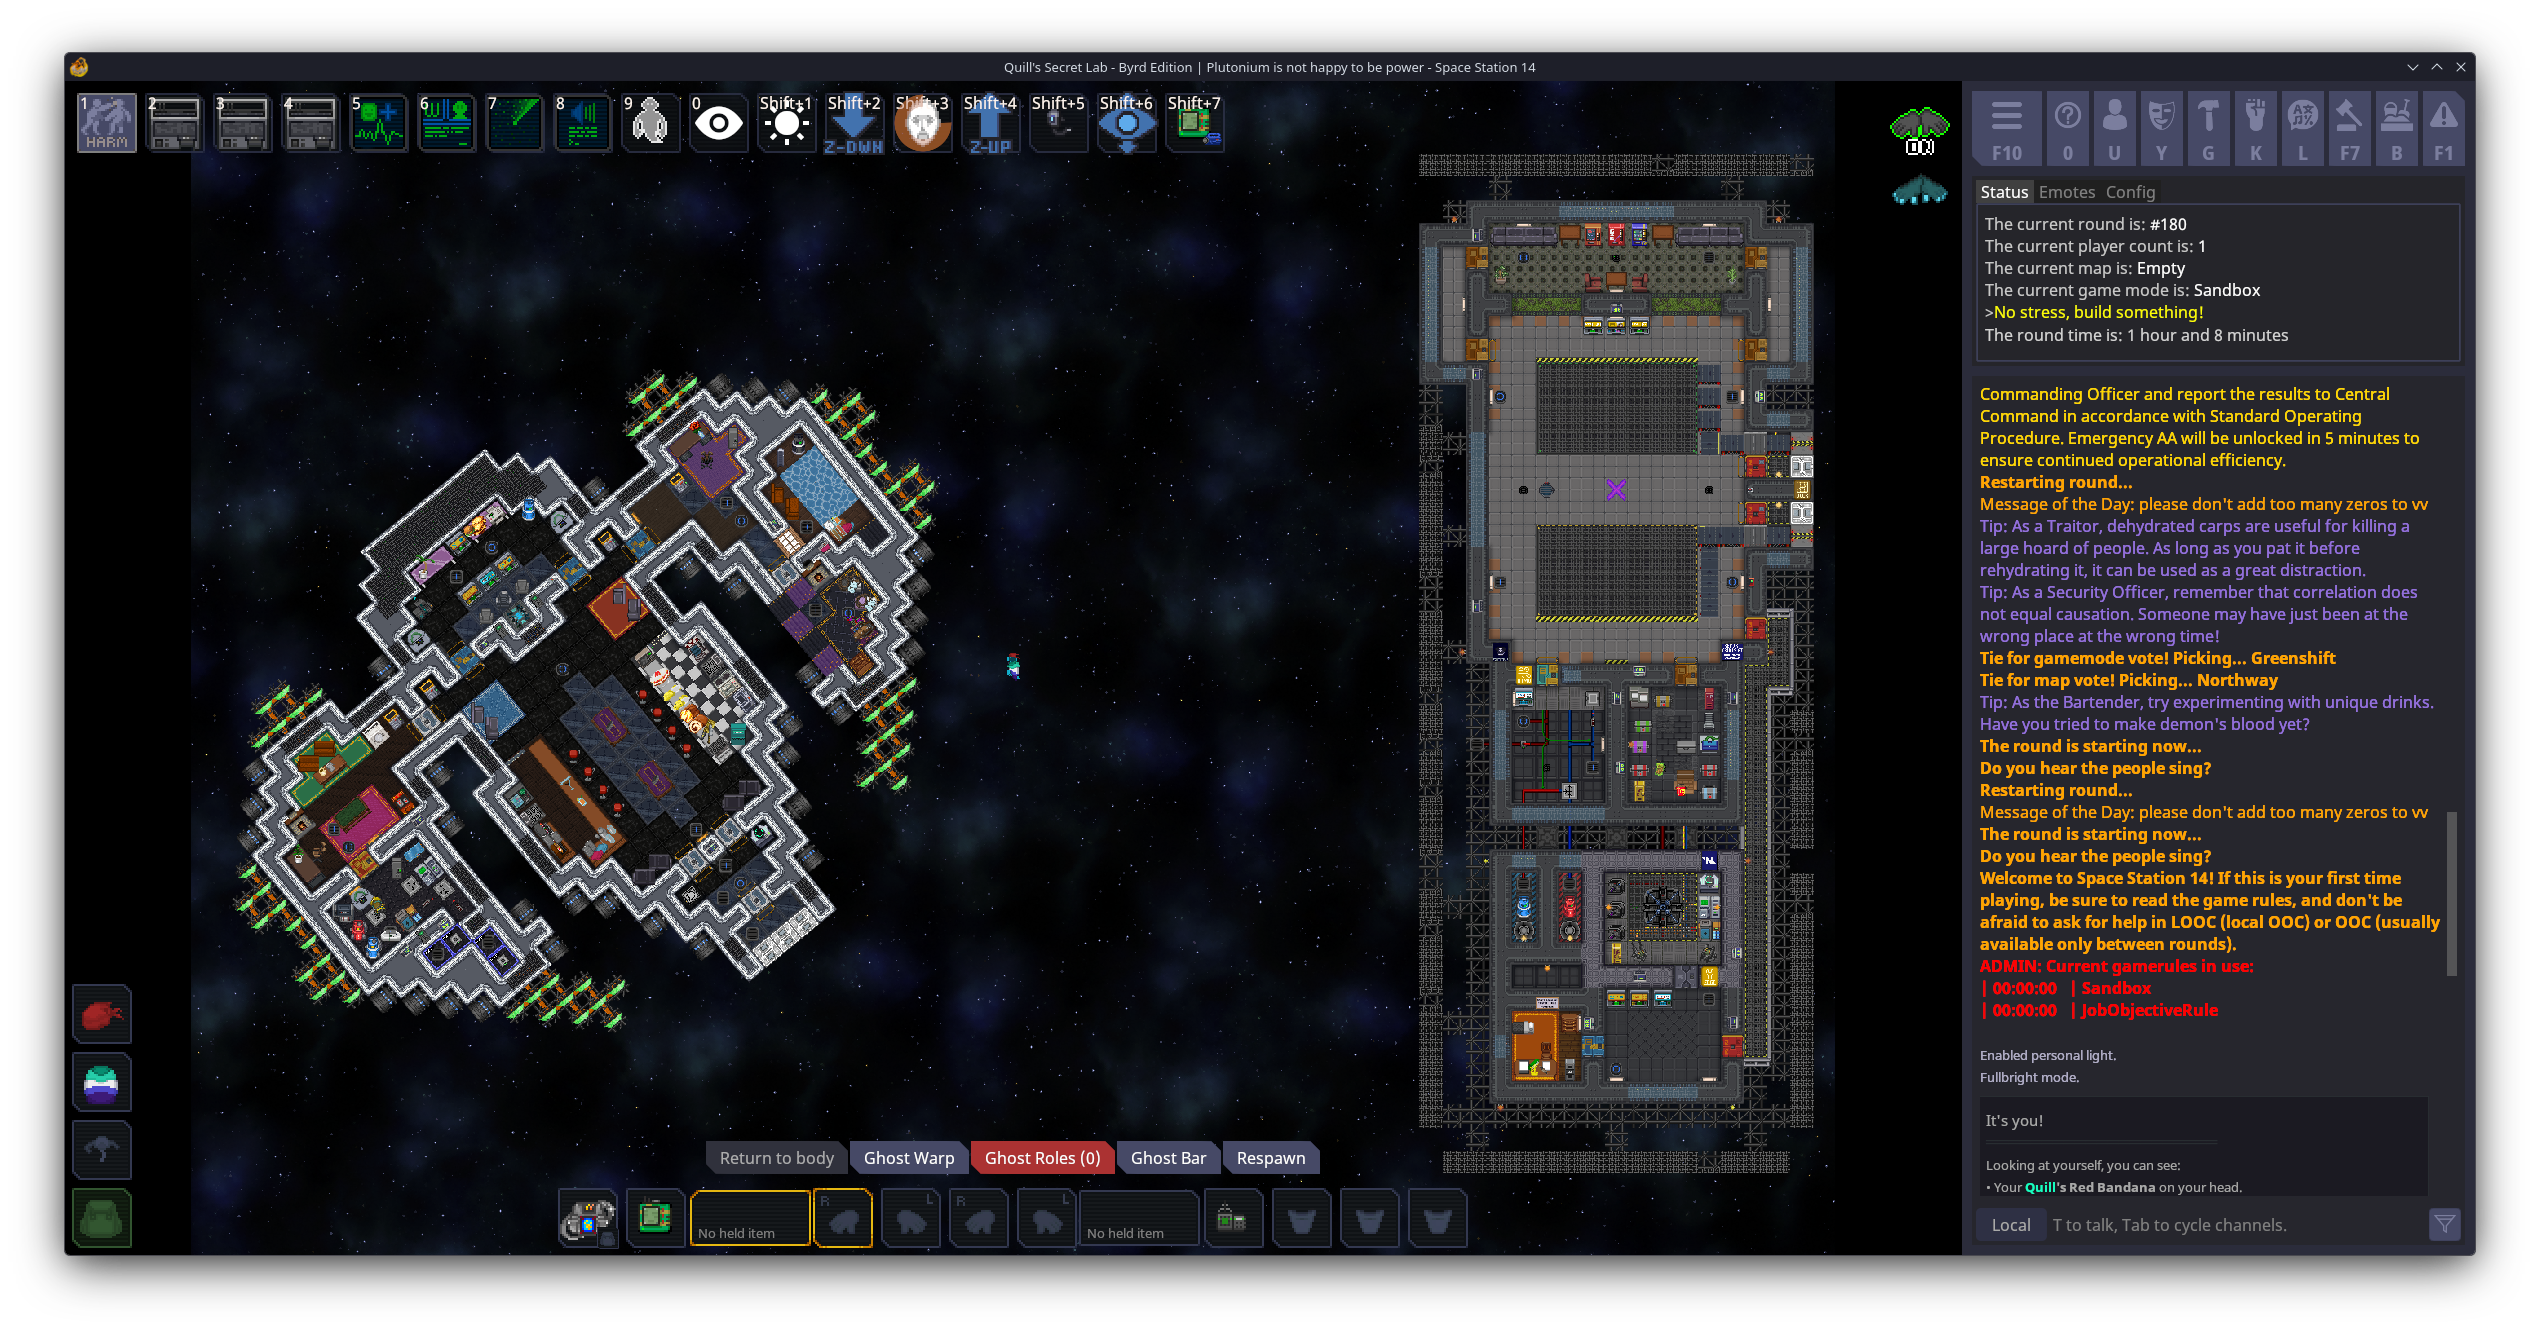
In this example I’ve teleported myself next to the ATS, moved away a bit, and used the coordinates from my ghost character to spawn it right next to the ATS.
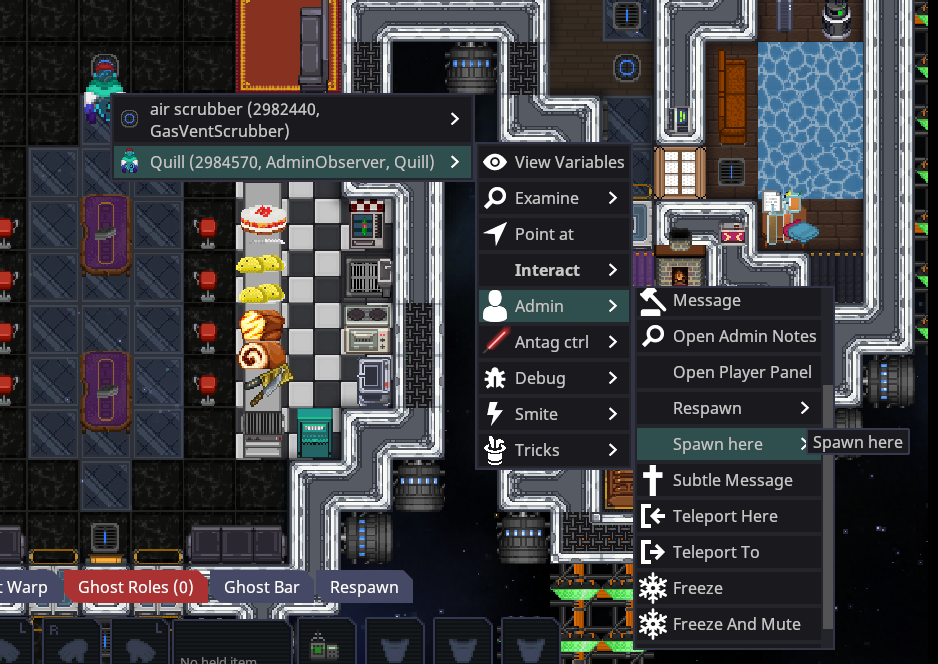
Then spawn yourself in by moving onto the grid, right-clicking on yourself -> admin -> spawn here and hope everything works out
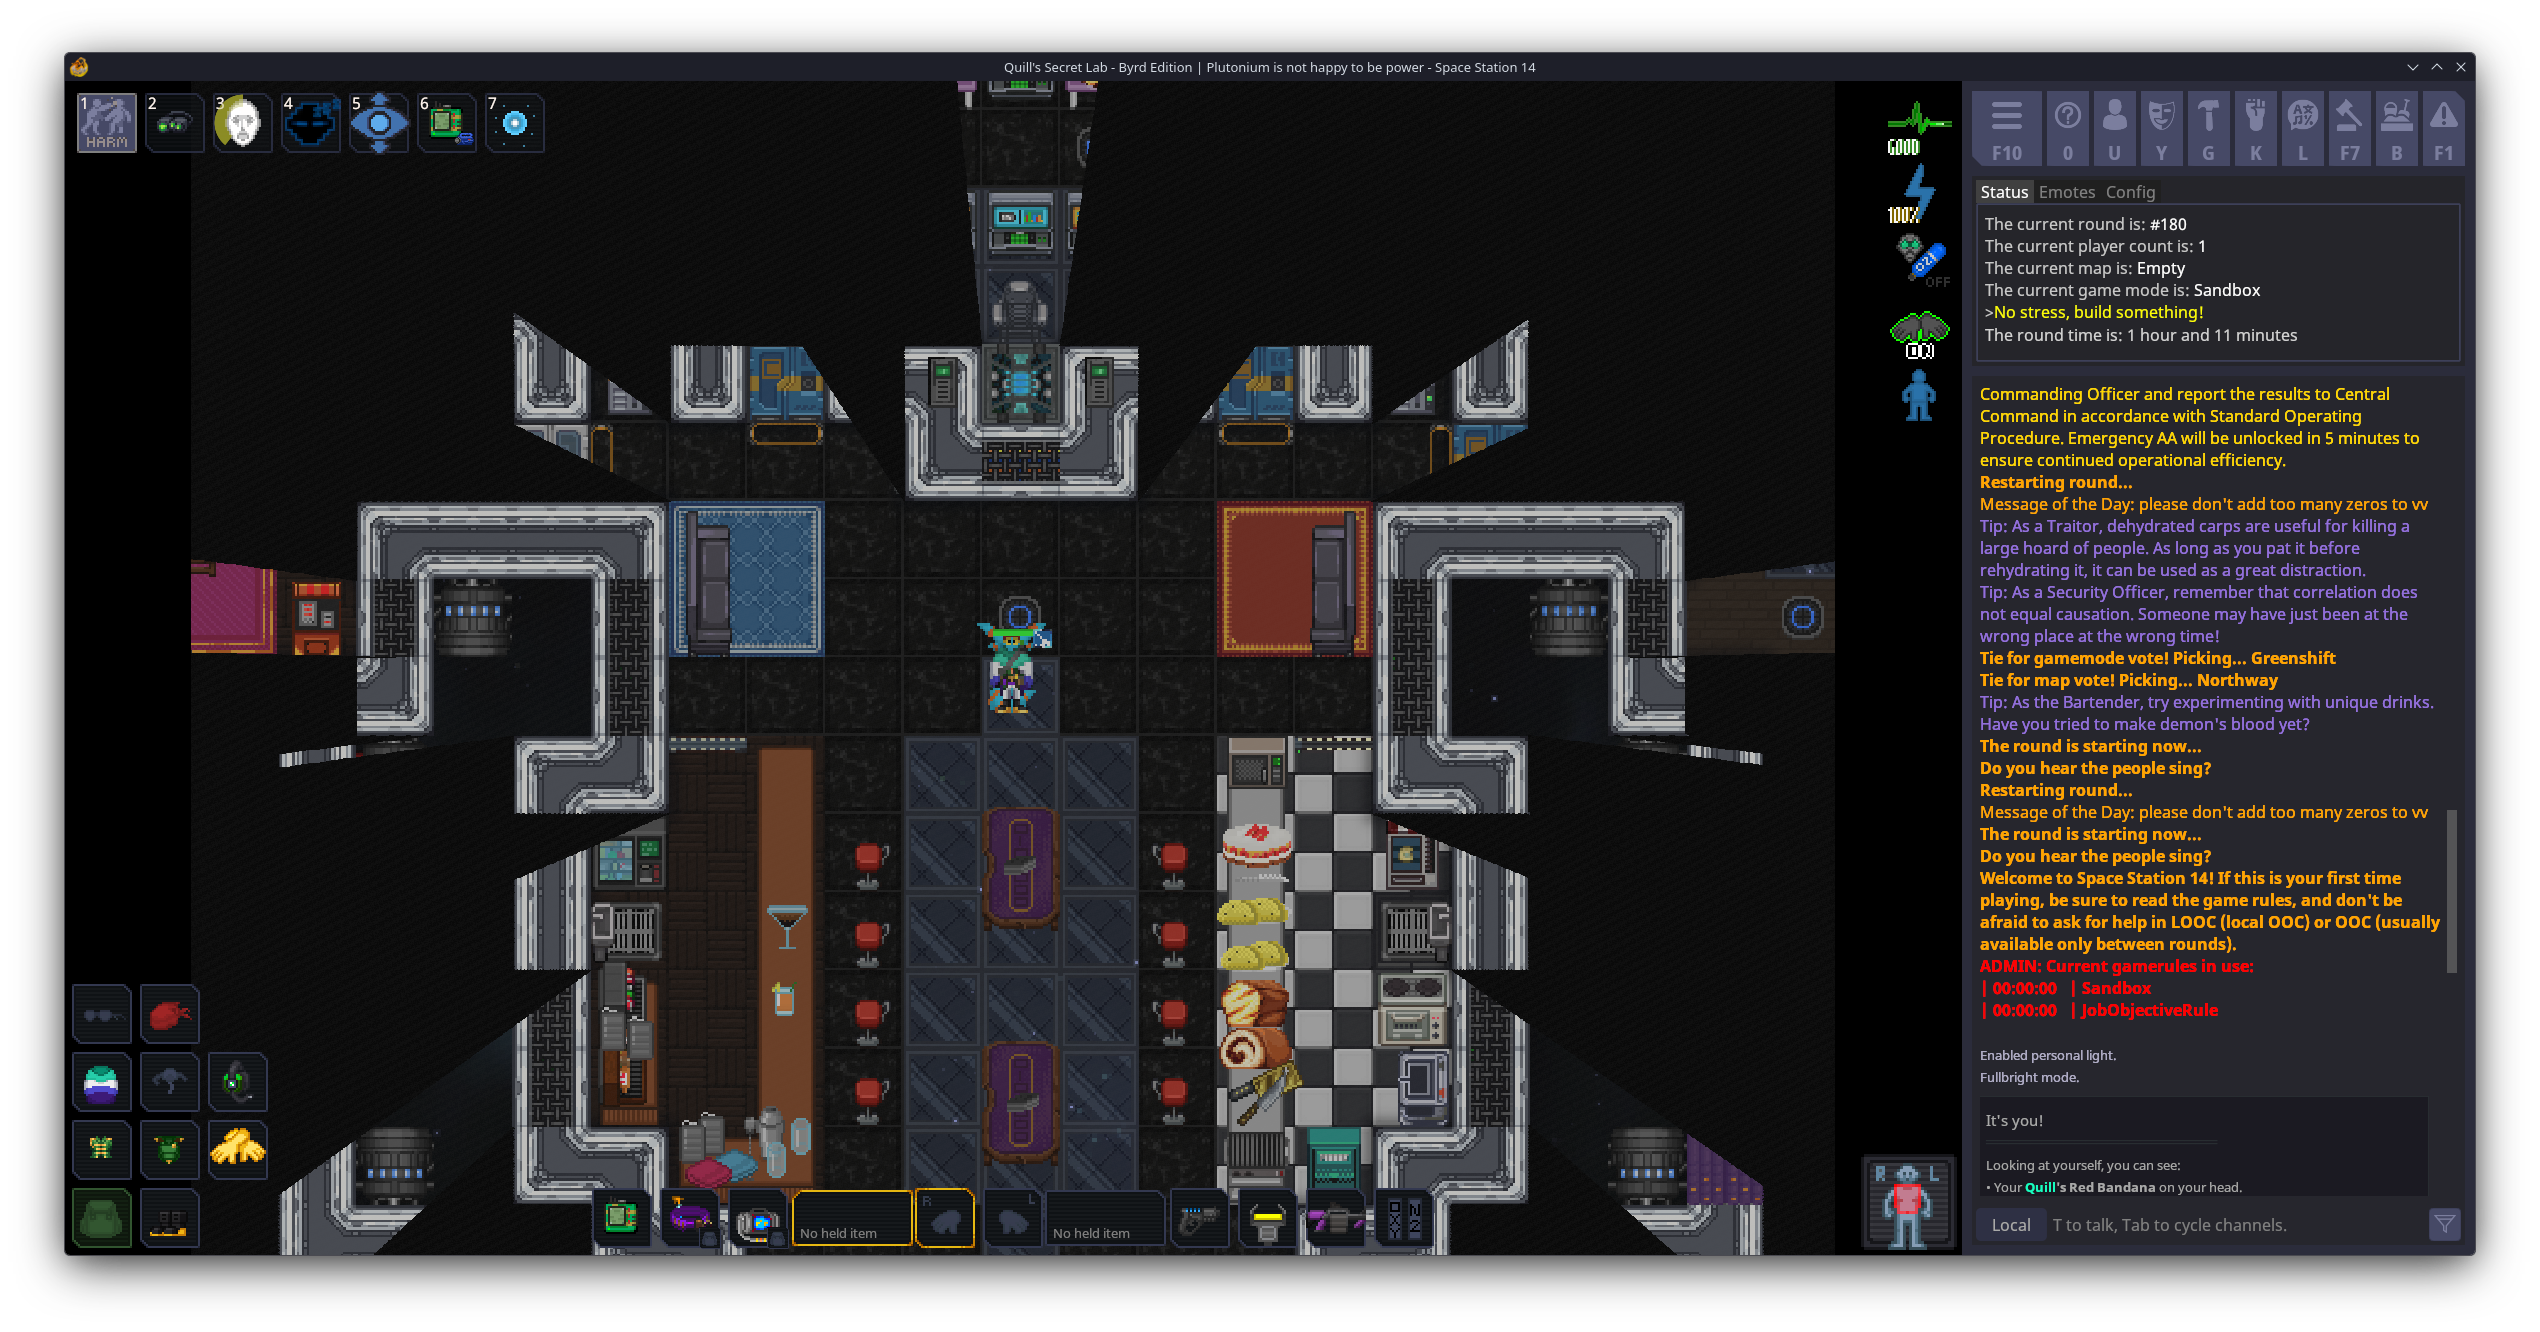
If you’ve done everything correctly, you should be able to breathe and enjoy a nicely built place for yourself and your friends.
marwrlurllwlarrul maaArwrurrlmAaArmwAlwarwrurrl
> Have fun!